FIVE TIPS FOR BETTER BLOG PHOTOS
A Big Shout out to Elizabeth owner from Oak & Oats for sharing the some fantastic tips for better blog photography!
"A When I first started blogging I stole images off Pinterest for my posts (GASP!) Don’t worry, I quickly realized that A) That was illegal and B) I loved most the blogs that shared their own photos. As someone who never took a photography class in her life, (wait…maybe I did in middle school?) I was intimidated by the idea of creating my own images but I knew I didn’t want to break the law . So I rocked the “Instagram” inspired photos where I would just post all the things I Instagram'd. This was back in 2011/2012 so it came with the best Instagram filters. Then I took a huge break from blogging to get married and picked it back up after when I had so much free time because I only had a part time job. About this time, I found a camera in our closest that Bruce got in high school and I used that on auto for my photos. This was the time I really started to get serious about my photography and I tried to create the types of images that I was drawn too. Then in May of 2014 I got a DSLR for my birthday and my blog photography has only grown & evolved since then.
The majority of the images on Oak + Oats are taken by me or my husband. The rest of them are taken by friends that I pass off my camera to & other photographers that I partner with (like my head shots & brand images by Stellar Propeller Studios.) I hold the power of a photograph in high regard and think original imagery is so beautiful & unique. I love bloggers that share their own images, inviting us into the moments of their day and sharing things through their eyes. Neither my husband or I have taken photography classes but we have read up on it and tried to learn all the things! One of the questions I get asked most is ” How do you take pictures for your blog?” While that is a very broad question, I am so excited to share with you some tips and tricks I have learned over time and encourage you to improve you blog images!
USE NATURAL LIGHTING
Lighting is one of the most important things in creating appeasing images for your blog. Try as hard as you can to only take photos for your blog during the day and near windows. I work full time so during the winter I have to plan ahead and take all the photos I need for the next week over the weekend. It is worth it because the quality is finally better! You may need to set up a little mock table by the window in your house to take pictures – do it (you can see I have one!) The bright natural lighting keeps the colors and white balance they way you want them. Cloudy and overcast days are also great times to take photos outside because the light is defused and you don’t have crazy harsh shadows!

LEARN YOUR CAMERA
I know it seems completely overwhelming, but the way to get the best photos out of your DSLR is to really get to know your camera! Read the manual, play around with settings, read all the articles, and know the terms. Shoot in Manual (meaning you will have to change your F stop, Aperture, and ISO for your photos) and shoot in RAW. You will be able to capture as much of the colors, clarity, and tell the story you want though the way you set up your camera. The best way to get a better feel for your camera is to practice all the time. I struggled with the terms and remembering what to do to the camera to create the image I wanted at first but then I realized that it is okay to take a picture with the wrong settings because it is digital and I can delete any images that I end up not using! Sam of Elah Tree has a great series called the Lens Revolution that helps you figure out those settings!
Also, a bit more about why you should shoot in RAW. RAW is a setting on your camera – you can also shoot in JPEG & RAW/JPEG (so two images for each picture.) If you shoot in JPEG, you can instantly share or use the photo wherever because it is in the jpeg format. It essentially makes the picture smaller, compressing it to be ready to share. It also take less room on your SD card. RAW creates a bigger file that is not compressed so it has a lot more detail. You have to upload them into Photoshop or lightroom (or some kind of software) to convert them into jpeg for your blog and sharing. However, because you have more details, you can edit RAW images much more to create the look you want (and not make it super grainy.) It just creates a freedom to continue working on the picture after you take it.

PLAN AHEAD & THINK OF THE STORY
This one goes along with what I said in natural lighting – you need to plan ahead times to take pictures for your blog so that you don’t feel rushed or overwhelmed (or like you are fighting the sunset!) Set aside a time for each specific photo shoot (you can even do them in a row if you want!) I try to think about the purpose and point of my photo shoot before I go into it. Am I trying to take an image for Instagram? Am I trying to share a make-up tutorial? Am I sharing a family recipe? Knowing the purpose of the shoot helps me figure out the story. If I am sharing a recipe, I may want pictures of the ingredients, pictures mixing the cookie dough, staged photos out of the oven, and maybe one with all my friends grabbing the cookies to enjoy! Thinking of a story helps make sure you get the images you want the first time.
Make sure you include time for you to change settings, readjust the area, or even move locations to get the best images. Also, take all the pictures! Sometimes I don’t know exactly what photo at what angle will share the best story with my readers. I tend to try a whole bunch of angles and settings until I find the ones I want to use. It is okay to have a bunch of images and then only end up with 5 – 10 for your photo shoot. Always fall on the side of taking too many pictures than too little!
USE PROPS & TOOLS
You may have noticed, I have a giant marble slab that I picked up at nice junk yard. I use it for the background of any image that I want to look like is on a nice marble counter top. This comes in handy for a lot of my Instagram and product photo shoots. Use props in your images (plants, coffee cups, pens, etc) and anything that will help create the story. Remember, a photo is only a snapshot. You get to live and see what you are photographing at all the angles – not everyone else gets that! You have to be the one to find a way to share that with your readers just through the way you shoot the images!
I tend to find most of my props around the house. When photographing a recipe post, use some of the ingredients in the background (like spilled flower or mint leaves.) Pull out your pretty pens for photos of your journal or use your wood floors for the perfect background! Also, try different rooms. I take a lot of pictures in my bedroom for more moody lighting or I follow the lighting to the best room in the house!
PRACTICE, PRACTICE, PRACTICE
Lastly, I just want to encourage you to practice! The more pictures that you take, the better you will get at taking them. My blog photography style didn’t evolve overnight – it has been a journey of taking pictures, analyzing those pictures, and trying new things to try to get the pictures I want! Practice is the only way to improve your photography. Be brave, try new things, play around with lighting, and keep up the good work!
MY GEAR
Canon EOS Rebel T3 Digital SLR Camera || This is the first DSLR that I have used and I really like it. I think it is pretty user friendly (as much as it can be), affordable, and takes quality photos! If you are looking to get started with a DSLR, I recommend this camera.
Canon EF 50mm || I LOVE this one! I use a 50mm lens for close up pictures where I want a blurry background. It can create really bright images because of its low f-stop.
Canon EF-S 24mm || I also have a 24mm which I use a lot because it has a larger frame (you can fit more into the picture.) You can still get the blurry background look with this lens and the f-stop is also pretty low. This is my newest lens so I am still playing around a lot with it!
Tripod || I got this Amazon Basics tripod and it is super affordable and works great! Tripods are so helpful for getting quality images in lower light situations. They are also super useful for taking pictures of yourself and group photos!
Remote Control || This partners with the tripod really well because it helps you take pictures away from your camera. Also, if you want to take pictures of the stars, you’ll need one of these!
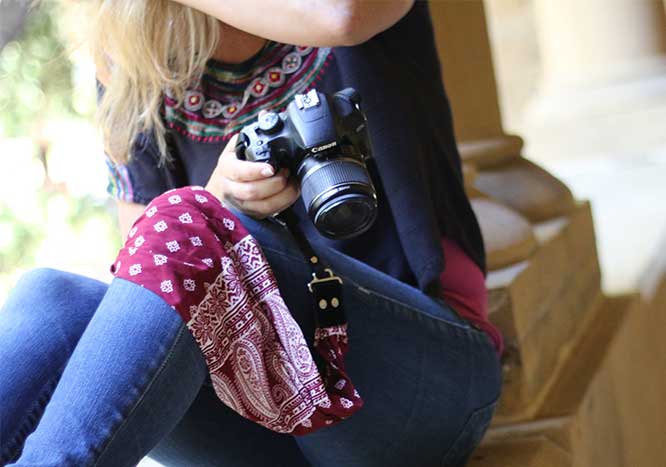
Camera Strap (c/o) || Camera straps are almost a necessity – especially if you are going to be walking around. Your camera is very valuable and you don’t want to drop it while you are taking a picture. Most cameras come with a strap but I encourage you to get a new one – one that fits your personality! They are fun, help you know which camera is yours, and are great for travel because they don’t scream “look I have a really expensive Canon product around my neck!” My beautiful strap is from Capturing Couture & I love the beautiful details.

XOXO, ELIZABETH
http://www.oakandoats.com/2016/02/five-tips-for-better-blog-photos.html